Organic Pest Management and Organic Fertilizer Options Simplfied!

More from my part-time job answering folks questions about gardening…

What can you use for organic pest management?
Organic gardeners have several options for pest management. The most important methods work with natural systems to provide long term protection:

Beneficial - Dogbane Beetle

Beneficial – Dogbane Beetle

Beneficial Insects: Plant hedgerows and flowering insectary plants to attract beneficial insects that help control crop pests. See our flower section for the best varieties to use.

Companion Planting: The age-old practice of companion planting is another method used to repel and deter pests. Certain flowers and herbs grown in near other crops are known to deter pests, improve vigor, and increase yields.

Here is a general list of some of the most common solutions:

Insecticidal Soaps: Some come pre-mixed while others are just mixed with water and sprayed on plants. These are effective for controlling aphids.

Diatomaceaous earth: A fossilized shell which when ground-up, breaks the outer layer of an insect and dessicates them externally on contact or internally by digestion. Useful to control slugs and snails, among other pests.

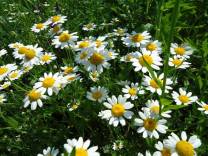
Pyerethrum Daisy grown in South Africa used to create the insecticide pyrethrin dust

Pyerethrum Daisy grown in South Africa used to create the insecticide pyrethrin dust

Bt – Bacillus thuringiensis: This is a naturally occurring bacteria with many powerful insect-specific strains that effectively kill caterpillars and insect larvae, minimizing the harm to beneficial insects. This is usually applied to plants and then ingested by pests.

Pyrethrins: A natural insecticide derived from a specific species of chrysanthemum, these are often combined with soap to provide broad spectrum control of pests. Use only as a last resort since this will kill the beneficial insects as well as the pests.

Organic fertilizers?

There are many organic fertilizers on the market today, and sustainable agricultural methods, such as cover cropping, composting, and rotating crops will provide most of a plant’s nutritional needs. Below is a general list of some of the most common materials:

Compost: Well decomposed compost is the best thing you can add to your soil to improve its structure, fertility, and water holding capacity. Make your own or buy from a reputable certified organic source.

Manure: Well decomposed animal manures provide nitrogen, but care must be taken to ensure they are fully composted to prevent potential health issues. The National Organic Program does not allow the use of fresh, raw manures in organic agriculture.

Fish and Kelp: Liquid fish emulsions supply nitrogen, while liquid kelp extracts supply micro-nutrients and help support strong roots and stems. These are especially useful for fertilizing seedlings until they are ready to plant outside.

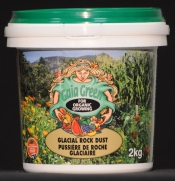
Ground Rock Powders: These can be mixed with soil to provide Phosphorus, essential minerals and trace elements. Phosphorous supports lush flowering and fruiting.

Natural Fertilizers: Dry powders derived from vegetable and animal sources can provide nutrition and modify the pH of your soil. These include alfalfa meal, cotton seed meal, bone meal, blood meal, and greensand, among others.
Happy Living!
Messy Shepherdess

lacewing

Beneficial – Lacewing


Seeds of Change FAQ – http://www.seedsofchange.com/faq.aspx

http://www.earthgauge.net/2012/spring-compost

https://www.sunlightsupply.com/page/quick-reference-conversions/

Vermiculture, aka worm composting.

Many years ago, I set up several garbage pails in the basement to collect all of our family’s kitchen waste and with 4 young children in the home, that can add up to a lot of waste.

red wigglers

red wigglers

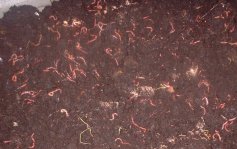
We would regularly check on the worms, red wigglers, to see their progress. For the kids there was a big fascination to see the process and look for worm egg sacks that might have just been shed, full of tiny little wigglers ready to grow on all the new waste just added to the pail.

But the big pay off was all that rich black soil conditioner, in the form of worm castings, that could be collected and used in the garden, potting mix, house plants and anywhere we want to see lush healthy plant growth.

For those interested in getting started, it’s a pretty basic system… you need worms, a container and bedding. That’s about it.

The Worms ~ you need red worms, no others kinds will do the job… Eisenia foetida (also known as red wigglers, brandling or manure worms) or Lumbricus rubellus (manure worm). It is recommended to have two pounds of worms for every pound of garbage but remember that if you give them adequate food and a good home they can double their populations every 90 days. That’s a lot of worms in a short time!

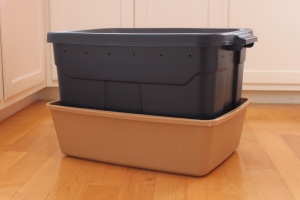
The Container ~ there are special worm bins you can buy, but you can also make do with a “Rubbermaid” type tub or I used a rubber garbage pail and built my own. You just need to circle the bin with several ‘air’ holes, one about every 2 inches around the circumference near the top of the bin, preferably not at the level where you will be putting in the worms and the waste materials.

The Bedding ~ a third of a bin loosely filled with damp shredded news paper (75% moisture is good, dripping wet is not) and ground egg shells is what I started out with….shredded cardboard works well, too.

Location is important too, as you don’t want the worms getting over heated and maybe die off or too cold to want to eat. The ideal environment is where the temperatures are between 40 to 80 degrees Fahrenheit or 4 to 26 degrees Celsius. Anything else and they should be moved someplace where they will have some protection. In the summer they were under the eaves of our garden shed, in the shade and kept out of the sun at all times. During the cold winter months I kept ours in the basement but there are lots of possibilities.

Dig down to about the middle of the bedding and place the worms in there, making sure to cover them up …then leave them alone for a few days to get comfortable. Don’t forget to put the lid on or the bedding will dry out.

Feed them fruit scraps, vegetable peels, tea bags and coffee grounds. Definitely avoid meat or meat by-products as well as dairy products or oily foods. All those will do is attract pests like flies or rodents.
Feed small amounts about once or twice a week, depending on how fast they eat it up. We soon found ourselves wanting more worm bins due to the large amount of scraps our family was producing and adding more food then the worms can eat, left us with a stinky bin once in a while. So it was either throw away that good compost material, make more bins or add more worms. Another thing that helps is to cut up the scraps into smaller pieces making it easier for them to eat up faster.

The best part is when the contents of the bin has mostly turned to worm castings, brown, earth-looking stuff, in about 4 or 5 months time. If you live in a colder climate it’s great winter project. By then it’s time to take the castings out and give your worms new bedding.

To do this move everything to one side of the bin, then push any partially composed food to the middle and add a bit more fresh food scraps. The worms will head for the food and once they’ve relocated to the new food pile there won’t be many, if any, left in the castings, so you can remove the worm castings without diminishing your worm count. Once you’ve removed all the castings you can then add new replacement bedding and your ready to start all over again. Of course this is also an ideal time to split your worms up and make more new bins.

Happy Living!

Messy Shepherdess


re-blogged from Land Share Canada: http://landsharecanada.com/users/messy-shepherdess/blog/vermiculture-or-worm-composting/

Seed Collecting!

I find this to be a most rewarding time in the garden…the time when I can collect seeds from the plants that have done the best in my garden and been allowed to grow out to maturity in order to collect their seeds for gardens of the future.

Earlier in the season I would chose the best most robust plants to not harvest for the table but to allow to grow out to full maturity. I mark those selected in some way, perhaps with a ribbon, twist tie or string, so they won’t accidentally be harvested on another day. Sometimes this can be a real exercise in restraint because it is sooo tempting to pick that luscious fruit or vegetable and bite into it. But restraint is a must, as selection requires judgement of what are the most healthy, pest and disease free plants in the garden in order to produce more of the same in the future.

Ideally, I try to pick a dry, windless day for collecting and hopefully there has not been too much in the way of rain for a few days previously. Wet or damp seeds tend to get mouldy and it takes more effort and time to make sure they are good and dry before being put in storage but sometimes the weather doesn’t cooperate and you just have to do what you can when you can. I often collect on more than one day as the plants don’t usually all mature at once. I find it relaxing to just walk through the garden and appreciate each of the stages the garden goes through over the season.
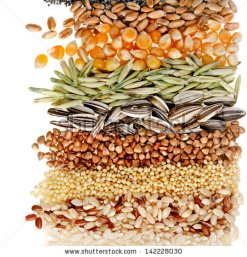
stock-photo-cereal-grains-and-seeds-rye-wheat-barley-oat-sunflower-corn-flax-poppy

Harvesting Seeds ~ Most plants seeds are easy to harvest. As the season progresses the plant will flower, (bees or other pollinators are pretty darn important right about here) the flower will fade, a seed pod will form or a fruit with seeds hidden inside will develop and the seeds will start to swell, usually bright and fresh at first then over time the pod and seeds will dry out turning into light brownish seed clusters of some form, depending on the plant variety. But ultimately I need the patience to allow the plant to fulfil it’s life cycle. Of course, plants come in a wide variety of forms, shades and colours so the above description is just a very general guideline and ultimately you just have to pay attention and observe how your plants evolve over the season to determine what form the seeds will take.
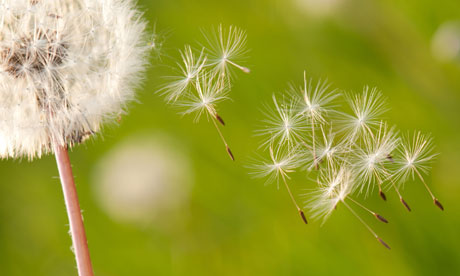
For example, squash plants will have their seeds inside the husk of the mature squash fruit, similarly tomatoes have their seeds inside the ripened flesh of the fruit, whereas with lettuce or spinach, it’s just a matter of waiting for the seeds to be ready to fall off the matured plant stalk where the flowers once were. Keep an eye on those plants as the seed could end up all over the ground if a windy day happens to occur.

Identifying Seeds ~ I can’t emphasize enough how important it is to make sure you identify the seeds as they are being collected. Carry a pen or marker and some scraps of paper with you while you are collecting in the garden. I’ve reached an age where I have to write down the name of the plant immediately or I’ll be shaking my head later trying to recall which seed is which. It’s only from years of familiarity that I can recognize many of the seeds and can occasionally get away without having a pen and paper with me while I’m collecting. But I’m hooped if I am growing 2 or more named varieties of the same plant.

Preparing Seeds ~ Some seeds need a little more in the way of preparation than others before being put in storage. For example, once the squash has thoroughly ripened I would simply open the husk to scoop the seeds out, wash them thoroughly to get rid of all the strings and fleshy particles that may be attached, then spread the remaining seeds out onto a dry surface, such as a paper towel or newspaper and allow them to dry, flipping them over occasionally for few days to ensure they don’t stick to the surface. Once I know they are completely dry then they will be ready to be put in storage.
Many seeds can just be collected by letting the seed fall off the mature plant stalk into a paper bag or container of some sort. Paper bags are ideal because they keep the seeds dark, dry and allow for air flow, where a plastic bag would harbour some moisture and perhaps cause the seed to mold.
Some seed heads can just be turned or gently bent into the bag and shaken off the stalk, while others need to be pulled off the stalk and perhaps allowed to ripen a little longer. Usually there is some chafe in the seeds (dried plant particles or dust & grit), that needs to be cleaned out of the seeds before they can be stored. The chafe is usually lighter than the seeds and can be gently blown away leaving only the seed behind.

Storage ~ I use a variety of storage containers. Typically anything that can be sealed to keep moisture out is good. Most commonly I use a zip-lock bag (with a permanent marker to write on the outside exactly what variety of seed it is inside and the date when it was harvested) and I have a ‘rubber maid’ type sealed box container that I organize them all in, so I can just carry the whole container out to where I am going to be doing some seed starts. But often for larger seeds like peas or corn, I may also use a small mason jar. Once my seeds are put in sealed containers of some sort, I can store those containers in a dark, dry, cool place, until I need them again and if I really want to preserve seeds for many years, then I may place them in the deep freeze.

Seed collecting and using these seeds year after year from the same garden allows plants to evolve and become the best they can be in the environment they are being grown in . In this way the resulting plants are specifically adapted to your garden and can optimize the growing conditions of that garden, producing a better healthier specimen that will grow to its full potential year after year.

There is just nothing like the feeling I get knowing that not only is most of the food on our table, grown by our own hands, but the best seed for our gardens of tomorrow are just waiting for their turn to explode into robust fruits and vegetables in the next season and the season after that and the season after that…

There ‘s lots more on this subject but I tried to at least give a basic idea of how to approach seed collecting and I really encourage everyone to do this in their gardens as much as they can. You will be surprised at how easy it can be and how abundantly rewarding it is.
Image
Happy Living!

Messy Shepherdess


re-blogged from Land Share Canada: http://landsharecanada.com/users/messy-shepherdess/blog/seed-collecting/